Android Java: RecyclerView Step by Step
Build an Android RecyclerView in Java step by step: adapter, ViewHolder, click handling, adding and removing items, and DiffUtil.
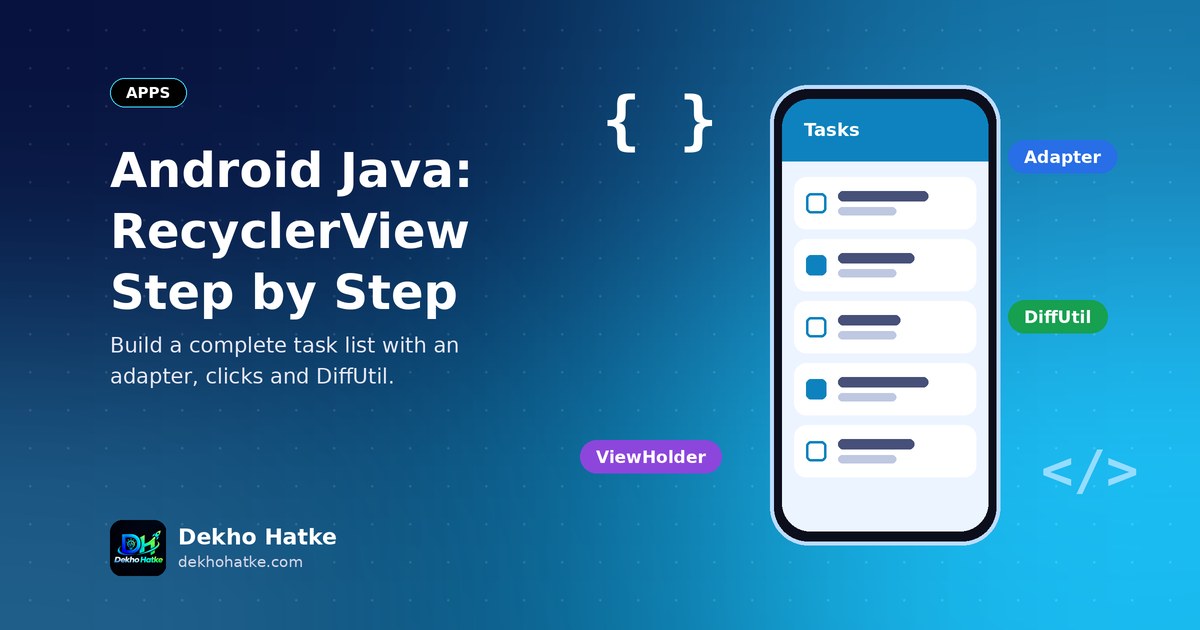
Almost every Android app shows a list somewhere: contacts, messages, products, notes, orders, news. If your list has hundreds or thousands of rows, you cannot create one view for each row, because the phone would run out of memory and scrolling would stutter. RecyclerView solves this problem. It creates only enough row views to fill the screen and then recycles them: when a row scrolls out at the top, the same view object is reused for a new row that scrolls in at the bottom.
In this tutorial you build a small but complete task list app in Java. You will add the library, create the layouts, write a model class and an adapter, handle taps on rows, add and remove items with proper animations, show dividers and upgrade to ListAdapter with DiffUtil for smooth updates. Every part has code that you can copy into Android Studio. If your list stays blank when you run it, our checklist for fixing "No adapter attached; skipping layout" will find the cause in minutes.
The four pieces of a RecyclerView list
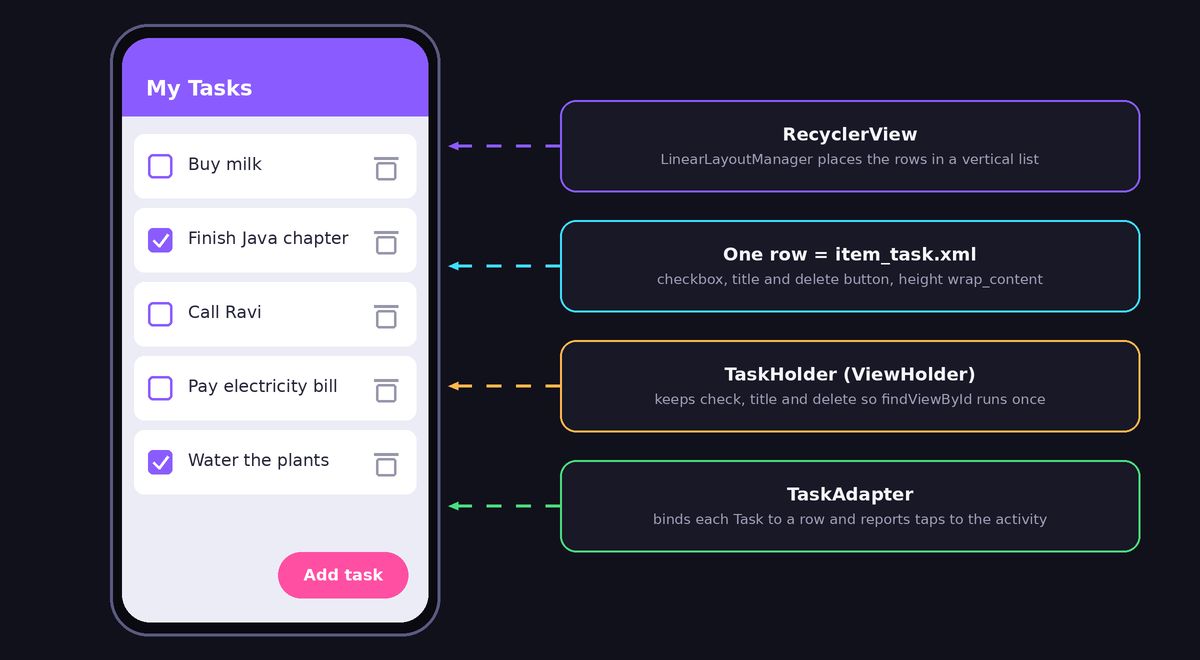
A working list always has four parts. Understanding them makes every error message easier to read:
- The data: a
Listof objects, such as tasks. RecyclerView knows nothing about it directly. - The row layout: an XML file that describes how one row looks.
- The ViewHolder: a small Java class that holds references to the views of one row, so that the app does not call
findViewByIdagain and again while scrolling. - The adapter: the class that connects data and views. It creates ViewHolders when needed and fills them with data for a given position.
A fifth helper, the LayoutManager, decides whether rows appear in a vertical list, a horizontal list or a grid.
Step 1: Add the dependency
Open the build.gradle file of your app module and add the RecyclerView library. Check the official AndroidX release page for the newest version number, the one below is an example:
dependencies {
    implementation 'androidx.recyclerview:recyclerview:1.3.2'
}
Press Sync Now. New projects based on Material Components may already include the library, but adding it explicitly does no harm.
Step 2: Create the model class
A model is a plain Java class that describes one row of data. Our list shows tasks with a title and a done flag:
public class Task {
    private final long id;
    private final String title;
    private boolean done;

    public Task(long id, String title, boolean done) {
        this.id = id;
        this.title = title;
        this.done = done;
    }

    public long getId() { return id; }
    public String getTitle() { return title; }
    public boolean isDone() { return done; }
    public void setDone(boolean done) { this.done = done; }
}
Giving each task a stable id is a good habit. Later, when we use DiffUtil, the id lets Android recognise the same task even if its position changes.
Step 3: Design the screen and the row
The activity layout contains the list and a button to add tasks. Create activity_main.xml:
<?xml version="1.0" encoding="utf-8"?>
<androidx.constraintlayout.widget.ConstraintLayout
    xmlns:android="http://schemas.android.com/apk/res/android"
    xmlns:app="http://schemas.android.com/apk/res-auto"
    android:layout_width="match_parent"
    android:layout_height="match_parent">

    <androidx.recyclerview.widget.RecyclerView
        android:id="@+id/recycler"
        android:layout_width="0dp"
        android:layout_height="0dp"
        android:clipToPadding="false"
        android:padding="8dp"
        app:layout_constraintTop_toTopOf="parent"
        app:layout_constraintBottom_toBottomOf="parent"
        app:layout_constraintStart_toStartOf="parent"
        app:layout_constraintEnd_toEndOf="parent" />

    <Button
        android:id="@+id/addButton"
        android:layout_width="wrap_content"
        android:layout_height="wrap_content"
        android:layout_margin="16dp"
        android:text="Add task"
        app:layout_constraintBottom_toBottomOf="parent"
        app:layout_constraintEnd_toEndOf="parent" />
</androidx.constraintlayout.widget.ConstraintLayout>
Giving the RecyclerView 0dp width and height with constraints makes it fill the screen without the wrap_content problems that many beginners hit. Now the row layout, item_task.xml. The root height must be wrap_content, otherwise one row would be as tall as the whole list:
<?xml version="1.0" encoding="utf-8"?>
<LinearLayout xmlns:android="http://schemas.android.com/apk/res/android"
    android:layout_width="match_parent"
    android:layout_height="wrap_content"
    android:gravity="center_vertical"
    android:orientation="horizontal"
    android:padding="16dp">

    <CheckBox
        android:id="@+id/check"
        android:layout_width="wrap_content"
        android:layout_height="wrap_content" />

    <TextView
        android:id="@+id/title"
        android:layout_width="0dp"
        android:layout_height="wrap_content"
        android:layout_marginStart="12dp"
        android:layout_weight="1"
        android:textSize="18sp" />

    <ImageButton
        android:id="@+id/delete"
        android:layout_width="40dp"
        android:layout_height="40dp"
        android:background="?attr/selectableItemBackgroundBorderless"
        android:contentDescription="Delete task"
        android:src="@android:drawable/ic_menu_delete" />
</LinearLayout>
The contentDescription on the image button is not decoration: screen readers announce it for people who use TalkBack.
Step 4: Write the adapter
The adapter is the heart of the list. It extends RecyclerView.Adapter and needs three methods. We also add a small listener interface so that the activity, and not the adapter, decides what happens when a user taps a row. Keeping that decision outside the adapter keeps the adapter reusable:
import android.view.LayoutInflater;
import android.view.View;
import android.view.ViewGroup;
import android.widget.CheckBox;
import android.widget.ImageButton;
import android.widget.TextView;
import androidx.annotation.NonNull;
import androidx.recyclerview.widget.RecyclerView;
import java.util.ArrayList;
import java.util.List;

public class TaskAdapter extends RecyclerView.Adapter<TaskAdapter.TaskHolder> {

    public interface Listener {
        void onToggle(Task task, boolean done);
        void onDelete(int position);
    }

    private final List<Task> tasks = new ArrayList<>();
    private final Listener listener;

    public TaskAdapter(Listener listener) {
        this.listener = listener;
    }

    public void add(Task t) {
        tasks.add(0, t);
        notifyItemInserted(0);
    }

    public void removeAt(int position) {
        tasks.remove(position);
        notifyItemRemoved(position);
    }

    @NonNull
    @Override
    public TaskHolder onCreateViewHolder(@NonNull ViewGroup parent, int viewType) {
        View v = LayoutInflater.from(parent.getContext())
                .inflate(R.layout.item_task, parent, false);
        return new TaskHolder(v);
    }

    @Override
    public void onBindViewHolder(@NonNull TaskHolder h, int position) {
        Task t = tasks.get(position);
        h.title.setText(t.getTitle());

        h.check.setOnCheckedChangeListener(null);   // avoid triggering while recycling
        h.check.setChecked(t.isDone());
        h.check.setOnCheckedChangeListener((btn, checked) -> listener.onToggle(t, checked));

        h.delete.setOnClickListener(v -> {
            int pos = h.getBindingAdapterPosition();
            if (pos != RecyclerView.NO_POSITION) listener.onDelete(pos);
        });
    }

    @Override
    public int getItemCount() {
        return tasks.size();
    }

    static class TaskHolder extends RecyclerView.ViewHolder {
        final CheckBox check;
        final TextView title;
        final ImageButton delete;

        TaskHolder(@NonNull View itemView) {
            super(itemView);
            check = itemView.findViewById(R.id.check);
            title = itemView.findViewById(R.id.title);
            delete = itemView.findViewById(R.id.delete);
        }
    }
}
Several details here are worth understanding, because they prevent classic bugs:
inflate(..., parent, false): thefalsemeans "do not attach yet". RecyclerView attaches the view itself. Passingtruecrashes the app.- Setting the checkbox listener to
nullfirst: rows are reused. When a recycled row gets new data andsetCheckedis called, the old listener would fire and report a change that the user never made. Clearing the listener before setting the state avoids that. getBindingAdapterPosition(): never capture thepositionparameter ofonBindViewHolderinside a click listener. After an insert or a removal, the position stored in the listener is wrong. Ask the holder for its current position at click time, and check forNO_POSITION, which appears while the row is being removed.
Step 5: Connect everything in the activity
import android.os.Bundle;
import android.widget.Button;
import androidx.appcompat.app.AppCompatActivity;
import androidx.recyclerview.widget.DividerItemDecoration;
import androidx.recyclerview.widget.LinearLayoutManager;
import androidx.recyclerview.widget.RecyclerView;

public class MainActivity extends AppCompatActivity implements TaskAdapter.Listener {

    private TaskAdapter adapter;
    private RecyclerView recycler;
    private long nextId = 1;

    @Override
    protected void onCreate(Bundle savedInstanceState) {
        super.onCreate(savedInstanceState);
        setContentView(R.layout.activity_main);

        recycler = findViewById(R.id.recycler);
        recycler.setLayoutManager(new LinearLayoutManager(this));
        recycler.addItemDecoration(
                new DividerItemDecoration(this, DividerItemDecoration.VERTICAL));

        adapter = new TaskAdapter(this);
        recycler.setAdapter(adapter);

        adapter.add(new Task(nextId++, "Buy milk", false));
        adapter.add(new Task(nextId++, "Finish Java chapter", false));

        Button add = findViewById(R.id.addButton);
        add.setOnClickListener(v -> {
            adapter.add(new Task(nextId++, "New task " + (nextId - 1), false));
            recycler.scrollToPosition(0);
        });
    }

    @Override
    public void onToggle(Task task, boolean done) {
        task.setDone(done);
    }

    @Override
    public void onDelete(int position) {
        adapter.removeAt(position);
    }
}
Run the app. You should see two tasks, a divider line between rows, and the Add task button inserting new rows at the top with a short animation. Deleting a row also animates. These animations come free, but only because we used notifyItemInserted and notifyItemRemoved. If you used notifyDataSetChanged() instead, the whole list would redraw without animation.
Choosing the right notify method
The adapter does not watch your list, so you must tell it what changed. Pick the most specific call:
notifyItemInserted(position)after adding one row.notifyItemRemoved(position)after removing one row.notifyItemChanged(position)after changing the content of one row.notifyItemMoved(from, to)after moving a row.notifyItemRangeInserted(start, count)after adding several rows.notifyDataSetChanged()only when everything changed, or when the list is small. It is the least efficient option and it disables animations.
If you remove an item from the list without notifying, RecyclerView may crash later with an IndexOutOfBoundsException ("Inconsistency detected"). Always change the data and notify in the same method, as add and removeAt do above.
Step 6: Upgrade to ListAdapter and DiffUtil
Calling the specific notify methods by hand is fine for add and delete. But when you load a new version of the whole list, from a database or from the internet, you do not know which rows changed. ListAdapter solves that. It computes the difference between the old and the new list on a background thread and animates only what changed. You write a small DiffUtil.ItemCallback:
import androidx.annotation.NonNull;
import androidx.recyclerview.widget.DiffUtil;
import androidx.recyclerview.widget.ListAdapter;

public class TaskListAdapter extends ListAdapter<Task, TaskAdapter.TaskHolder> {

    public TaskListAdapter() {
        super(DIFF);
    }

    private static final DiffUtil.ItemCallback<Task> DIFF = new DiffUtil.ItemCallback<Task>() {
        @Override
        public boolean areItemsTheSame(@NonNull Task a, @NonNull Task b) {
            return a.getId() == b.getId();
        }

        @Override
        public boolean areContentsTheSame(@NonNull Task a, @NonNull Task b) {
            return a.getTitle().equals(b.getTitle()) && a.isDone() == b.isDone();
        }
    };

    @NonNull
    @Override
    public TaskAdapter.TaskHolder onCreateViewHolder(@NonNull android.view.ViewGroup parent, int viewType) {
        android.view.View v = android.view.LayoutInflater.from(parent.getContext())
                .inflate(R.layout.item_task, parent, false);
        return new TaskAdapter.TaskHolder(v);
    }

    @Override
    public void onBindViewHolder(@NonNull TaskAdapter.TaskHolder h, int position) {
        Task t = getItem(position);
        h.title.setText(t.getTitle());
        h.check.setChecked(t.isDone());
    }
}
To update, you call adapter.submitList(newList) with a new list object. If you modify the old list and submit the same object, nothing happens, because ListAdapter thinks it is unchanged. areItemsTheSame answers "is this the same task?", and the id is the right thing to compare. areContentsTheSame answers "did anything visible change?". Note that for the nested TaskHolder to be used outside its class, make it public static and its constructor and fields accessible.
Different row types
Sometimes a list mixes row types, for example a header and normal items. Override getItemViewType(int position) in the adapter to return a number for each type. onCreateViewHolder receives that number as viewType and inflates the matching layout. Keep one ViewHolder class per type. This is the standard way to build section headers, ads between items and "loading" rows.
Performance tips that matter
- Never do heavy work in
onBindViewHolder. It runs while the user scrolls. Do not read files, parse JSON or create many objects there. - Load images with a library such as Glide or Coil, and not by decoding bitmaps yourself. They cache, resize and cancel requests for recycled rows.
- Call
setHasFixedSize(true)on the RecyclerView when its size does not depend on the content of the adapter. It allows small optimisations. - Keep row layouts flat. Deeply nested layouts are slow to measure. A
ConstraintLayoutoften replaces several nestedLinearLayoutviews. - Use stable ids if your data has them (
setHasStableIds(true)withgetItemId), which helps animations and state keeping.
Common mistakes
- Forgetting
setLayoutManagerorsetAdapter, which leaves the list blank. - Using
match_parentas the height of the row layout root. - Capturing
positionin click listeners instead of asking for the adapter position at click time. - Changing the list from a background thread without switching to the main thread before notifying.
- Submitting the same list instance to
ListAdapter. - Doing network calls inside
onBindViewHolder.
Frequently asked questions
Should I use ListView instead?
No. ListView is an older component. It lacks the ViewHolder pattern by default, has fewer animation options and is harder to customise. RecyclerView is the standard choice for new apps.
Can I make a grid or a horizontal list?
Yes. Replace the LayoutManager: new GridLayoutManager(this, 2) for two columns, or new LinearLayoutManager(this, LinearLayoutManager.HORIZONTAL, false) for a horizontal list. The adapter stays the same.
How do I handle a click on the whole row?
Set itemView.setOnClickListener in the ViewHolder constructor or in onBindViewHolder, and forward the event to your listener interface as we did for the delete button.
Does this work with Kotlin?
Yes, the structure is identical. Only the syntax differs. The concepts of adapter, ViewHolder, LayoutManager and DiffUtil are the same.
How do I save the list so it survives restarting the app?
RecyclerView only displays data. Store the tasks in a database such as Room or in a file, load them when the screen starts and submit them to the adapter.
Final thoughts
RecyclerView looks like a lot of code at first, but the pattern never changes: data, row layout, ViewHolder, adapter and LayoutManager. Once you have written one list, every later list is a copy with different names. Start with the simple adapter, learn the notify methods, and move to ListAdapter with DiffUtil when your data changes often. The result is a list that scrolls smoothly even with thousands of items.